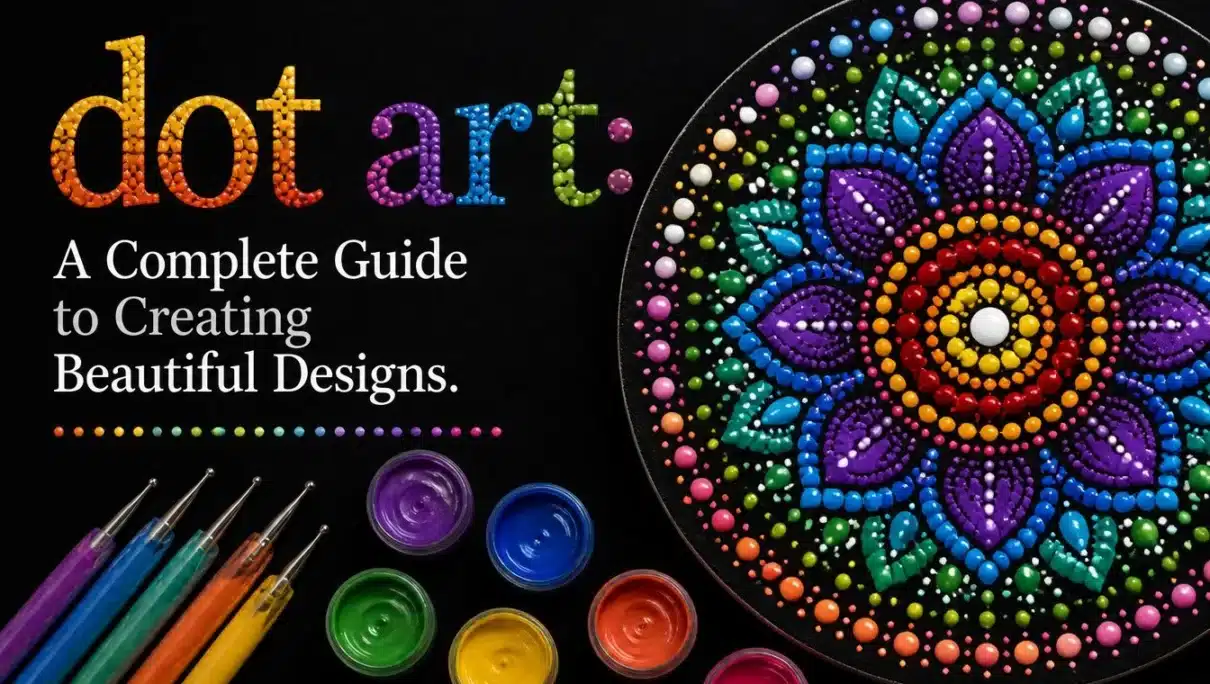
Dot art combines the detailed patterns of mandala designs into abstract works, inviting you to relax and get lost in the creative process. What makes dot art special is its bright colors, each made up of many tiny dots. This mix of dots and mandala shapes turns the artwork into a lively and captivating display. Originating in Aboriginal Australia, dot art is very calming and can even feel healing. The mix of traditional mandala and dot art creates pieces that feel timeless while adding a fresh, modern vibe to any home.
Creating dot art takes patience and focus. While it began in Australia, many women there have found it brings a sense of calm. Some artists follow traditional methods, while others experiment with new styles and broader brushstrokes. By layering dots, they add depth and bold contrasts, making each artwork feel full of life. What inspires these changes?
Understanding Dot Art
- Creates images using individual dots.
- It is suitable for artists at any skill level.
- You can create dot art on paper, canvas, wood, rocks, or ceramics.
- Dot art brings together creativity, patience, and carefulness.
Dot art, commonly referred to as pointillism, is a type of visual art in which an image is created using tiny dots of color. The colors can be combined by the viewer’s eye to provide the appearance of many tints and colors, and the dots are arranged close together to give the impression of a continuous image.
Early examples of dot art can be found in works by prehistoric societies such as Aboriginal Australian and Native American art. Dot art has been employed by artists throughout history. Yet French painter Georges Seurat, who invented the word “pointillism” in the late 19th century, used a highly controlled method that employed tiny, regular dots of color to produce vivid, bright images.
Dot art is still practiced by artists today, with variations on the style including stippling (the use of tiny, distinct dots) and creating pictures using circles, squares, or other shapes in place of dots. Many materials, such as paint, markers, and digital tools, can be used to make dot art.
Essential Materials for dot art
- Dotting tools in different sizes
- Acrylic paints
- Canvas or thick paper
- Paint palette
- Cotton swabs or pencil erasers
- Fine markers for practice
Paint is needed if you want to make dot art the traditional way. Acrylic paints are a good choice because they dry fast and can be used on many surfaces. Oil paint is another option, but it is harder to use and takes more time to dry. To make dots, you need small brushes with fine tips. You can use round or flat brushes depending on the size and shape of the dots you want.
Depending on the type of dot art you wish to make, different materials may be required. However, the following materials are some of the most popular ones:
- Surface: You can use a variety of materials, such as canvas, paper, wood, or even rocks, to create dot art. Make sure the surface is clean and free of anything on it before you begin.
- Palette: You need a palette or tray to mix your paint colors. A palette with separate spots for each color helps keep them organized.
- Dotting tools: If you don’t want to use brushes, you can use dotting tools. These are made just for making dots and come in various sizes and shapes.
- Digital tools: To create digital dot art, you need a computer or tablet and software such as Adobe Illustrator or Photoshop.
- These are some essential supplies for making dot art, though extra supplies like stencils, rulers, or compasses may be needed depending on the kind of dot art you want to make.
Popular Techniques Used in this Art
- Single-dot layering
- Gradient dot spacing
- Circular mandala patterns
- Color blending with dots
Making beautiful dot art is more than just putting down random dots. Artists change the size and spacing of each dot to create texture, depth, and a sense of movement.
There are various styles of dot art, each having a special method for using dots to create pictures. Here are a few of the dot art styles that are most popular:
- Pointillism:
Georges Seurat created this kind of dot art in the late 19th century, and it is the most famous. In the bigger picture, pointillism uses tiny, evenly spaced dots of color. The dots are placed carefully to give the look of many colors and shades.
Stippling is a kind of dot art that uses small, separate dots of color. To add texture and depth, the dots are spread out unevenly and randomly. Stippling is often used in comics, drawings, and other art forms.
- Digital dot art:
Thanks to digital technology, artists can now create dot art using programs such as Adobe Illustrator and Photoshop. In digital dot art, the position and color of dots can be controlled more precisely and easily.
Aboriginal dot art is a traditional Australian art style that uses dots to express narratives, natural settings, and other cultural components. Detailed motifs are frequently created using dots alongside other symbols and patterns.
- Dot art with a mandala design:
Mandala dot art is based on traditional mandala patterns. Circles and dots are used to form balanced, detailed designs, often with a calming or spiritual feeling.
These are only a few examples of the various kinds of dot art that are available. Each kind of dot art has its own aesthetic and method for employing dots to build pictures.
Why Dot Art Is Becoming So Popular
Reasons many people enjoy it:
- Easy for beginners
- Relaxing creative activity
- Minimal equipment required
- Suitable for all age groups
Dot art attracts people with its calming, creative rhythm. Paying attention to each dot helps you relax and let go of daily stress.
Unlike highly detailed drawing styles, dot art does not require perfect sketching abilities. Beginners can start with simple flowers or mandalas before progressing to animals, landscapes, or abstract compositions.
Dot art is popular because it is so versatile. Artists use it on wall art, mugs, notebooks, greeting cards, furniture, and even handmade jewelry.
Getting Started as a Beginner
Dot art can be fun and rewarding, but it does require patience and attention to detail. Here’s a simple way to get started:
- Create a sketch first:
Start with a light pencil drawing of your pattern on the surface. This drawing will help you know where to put your dots.
- Decide on your colors:
Pick the colors you want to use in your dot art. You can use just a few colors or many, depending on what you like. Put some paint on your brush or dotting tool. Dab it on a paper towel or palette to remove excess paint after dipping.
- Make your dots:
Begin making dots by gently touching the surface with your brush or tool. Press harder for bigger dots and lighter for smaller ones. Try to space them evenly, but don’t worry about being perfect.
- Develop your color scheme:
As you add more dots, your design will start to show more colors and shades. You can also layer different colors to create new effects.
- Take breaks:
Dot art can take time, so rest when you need to. This helps stop tiredness and eye strain.
When you finish, let your dot art dry completely before framing or showing it. You can also use a clear coat or spray to protect it. These are just some basic tips for making dot art. Feel free to try different techniques and styles, as dot art is a flexible medium for creating unique pieces.
Creative Dot Art Project Ideas
- Mandala paintings
- Painted stones
- Greeting cards
- Decorative coasters
- Flower patterns
- Animal silhouettes
- Wall canvas designs
Once you understand the basics, there are countless ways to explore dot art creatively.
Decorated rocks are among the easiest projects and make excellent gifts. Mandalas remain a favorite because they teach symmetry and allow unlimited color combinations.
For home décor, many artists decorate wooden trays, candle holders, flower pots, clocks, and photo frames using colorful dotted patterns. Personalized notebooks and handmade bookmarks also make thoughtful gifts while providing opportunities to experiment with different designs.
Tips to Improve Your Dot Art Skills
- Practice straight rows of dots daily.
- Start with simple geometric designs.
- Experiment with different tool sizes.
- Preserve consistent paint thickness.
- Work from the center outward.
- Clean tools frequently.
- Study color combinations before beginning.
You improve by practicing regularly, not by making things too complicated. Doing simple exercises over and over helps your hands remember how to make even dots.
Watching professional dot artists can give you ideas for layouts, colors, and new techniques. Rather than copying their work, use what you learn to create your own style.
Most importantly, enjoy the learning process. Every completed project teaches new skills that enhance upcoming designs.
Benefits of Practicing Dot Art
Dot art has several creative and therapeutic benefits. Here are some ways it can be helpful:
- Focus and concentration are enhanced:
Dot art demands intense attention, which might help develop these abilities over time. One way to increase attention and reduce distractions is to focus on drawing individual dots.
- Improves hand-eye coordination and fine motor skills:
Creating tiny, precise dots challenges your hand-eye coordination and fine motor skills. With regular practice, you will notice these abilities growing stronger and more refined.
- Reduces anxiety and stress:
Dot art offers a peaceful escape, gently easing them. The rhythmic motion of dotting can bring a sense of calm and help nurture mindfulness.
- Enhances self-expression and creativity:
The process of making countless dots teaches patience and persistence. As you dedicate time to your artwork, you will find these qualities growing within you.
- Increases patience and persistence:
The process of making countless dots teaches both. As you dedicate time to your artwork, you will find these qualities growing within you.
- May improve visual perception:
Experimenting with dots of different sizes and colors can sharpen your visual perception and enhance your ability to recognize subtle color variations.
Dot drawing is fun and also good for your mental well-being. It gives you a playful and rewarding way to express your creativity.
Conclusion
Dot art shows that simple techniques can lead to amazing results. With a few tools and some patience, you can turn everyday surfaces into colorful, textured art. Whether you want to relax, be creative, or decorate your home, dot art is an easy and fun way to express yourself.
The best part is that each project helps you build confidence. Begin with simple patterns, try out different colors, and slowly take on more detailed designs. As you practice, your own style will develop, making dot art a creative journey that keeps inspiring you.
Frequently Asked Questions
What is dot art?
Dot art is a creative technique in which artists create images and patterns using carefully placed dots instead of continuous lines or brushstrokes.
Is dot art suitable for beginners?
Yes. Dot art is one of the easiest painting styles to learn because it requires basic tools and simple techniques that improve with practice.
Which paint is best for dot art?
Acrylic paint is the most popular choice because it provides vibrant colors, dries quickly, and forms clean, consistent dots.
What surfaces can I use for dot art?
You can create dot art on canvas, paper, rocks, wood, ceramic pots, glass, coasters, greeting cards, and other smooth surfaces.